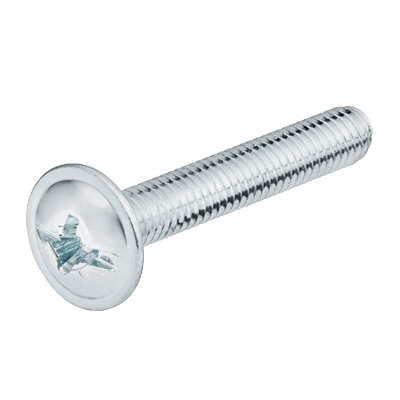
Getting Started: The Essentials for Installing Knobs and Handles
Before you embark on a kitchen renovation or simply updating your kitchen cabinet handles, it's vital to gather the essential tools.
Here's a list of common tools needed to ensure proper installation of various kitchen hardware such as cabinet pulls, drawer front pulls, and other types of cabinet knobs:
To begin with, you'll need a few essential items.
- Tape Measure
- Pencil for marking
- Cordless Drill
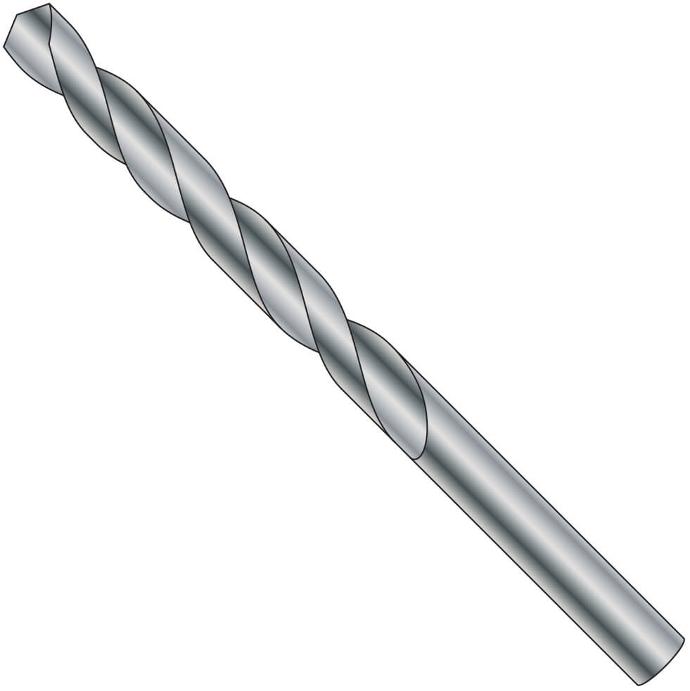
- 5mm Wood Drill Bit
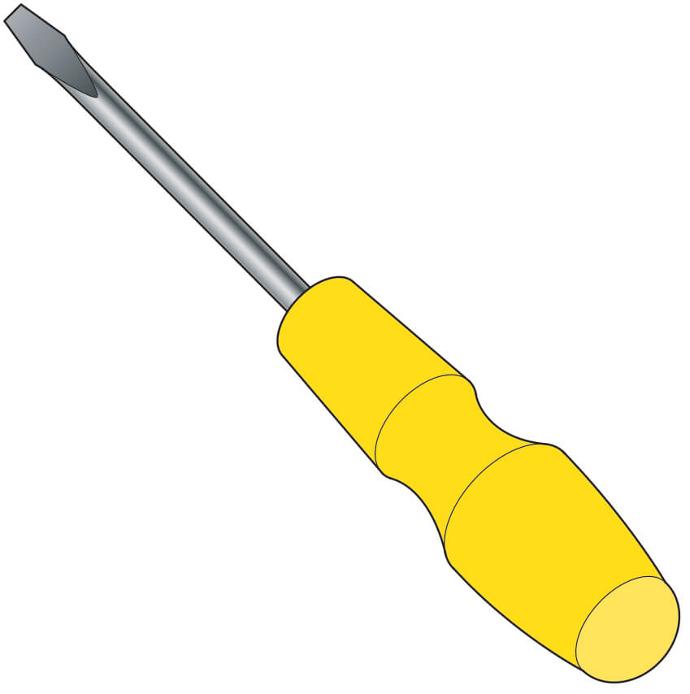
- Hand Screwdriver
- A Handle Drilling Jig or a hardware template (Optional)

Remember, different types of hardware require distinct installation methods. For instance, handle screws are an M4 thread typically drilled by using a 5mm bit, which allows for some wiggle room.
As a trained cabinet maker and professional kitchen installer who runs Better Kitchens, my advice would be that a 5mm hole grants perfect leeway for an M4 screw.
If this is your first time dealing with kitchen hardware, be patient, take your time and follow the guidelines properly. The last thing you want is to install your brand new cabinet pulls or kitchen cabinet handles in the wrong place, causing damage to your new cabinets or having to redo your work.
Personal preference plays a big role in where you place your new kitchen cabinet hardware on your wall cabinets, base cabinets, and drawer fronts.
However, there are conventional rules followed by many do-it-yourselfers and professionals.
For instance, cabinet hardware placement on base cabinet doors or upper cabinets usually falls within the top section of the door frame, while drawer hardware, like drawer knobs and drawer pulls, is typically installed in the centre of the drawer front.
We must mention to avoid the mistake of placing two handles on wide drawers. Despite seeming convenient at first, users often end up using one handle, causing one-sided pull that results in twisting the drawer mechanism over time.
Hence, it is recommended to install a single pull handle in the centre of the drawer for wide units.
Finally, old holes from old hardware on your old cabinets can pose a challenge for your kitchen renovation. If you're preserving the old cabinets and only switching out the hardware, you may need to fill old holes.
It's an easy way to start fresh and will make your hardware installation look flawless.
Choosing the Right Hardware for Your Kitchen Cabinets
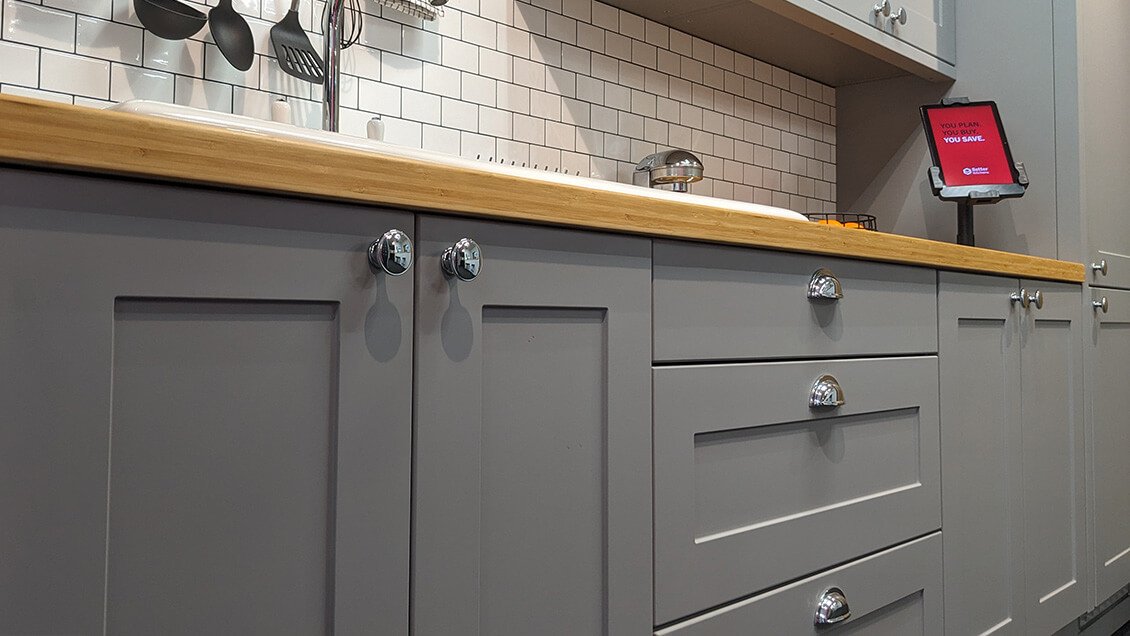
Chrome Knobs and Cup Handles on Kitchen Doors Better Kitchens
The type of hardware you choose for your kitchen cabinets can significantly affect both the functional and aesthetic aspects of your kitchen space. There are various types of cabinet hardware like pulls, knobs and handles, each exuding its unique vibe.
You should consider the kind of cabinet doors your kitchen has before deciding on the hardware. For example, cabinet knobs go best with door panels, whereas pull handles are preferred for slab drawers and base cabinet doors.
Similarly, finger pulls and cup pulls may be suitable for cabinet drawers. All these kinds of hardware should align with the style, material, and colour of your new cabinets or newly renovated old cabinets.
Before settling on new hardware, take a good look at your old hardware. Examining the old hardware can provide essential insights about your personal preferences and what works best in your kitchen space.
The goal here is ensuring your new kitchen boasts a perfect blend of form and function.
The size of the hardware is another key consideration. Shorter handles or smaller knobs may be preferable for upper cabinets and wall cabinets, whilst longer pulls might be better-suited for larger lower cabinets and kitchen drawers.
Larger pulls may also be a good choice for wide drawers, helping to prevent any twisting of the drawer mechanism.
Another vital aspect is the screw holes; no one wants the wrong hole in the wrong place on the cabinet door. You might want to consider using your old holes, if they are in a desirable place and fit your new hardware.
But if you're installing new cabinet hardware for the first time, you might need to create new holes. For this, we advise using a 5mm drill bit for M4 thread handle screws to give some wiggle room.
Choose your hardware wisely, keeping in mind your comfort, the layout of your kitchen, and of course, how it will complement the style of your kitchen cabinets.
In the Detail: Understanding Handle Screws and Threads
Understanding handle screws and threads is a fundamental step in achieving a secure and sturdy installation of new kitchen hardware.
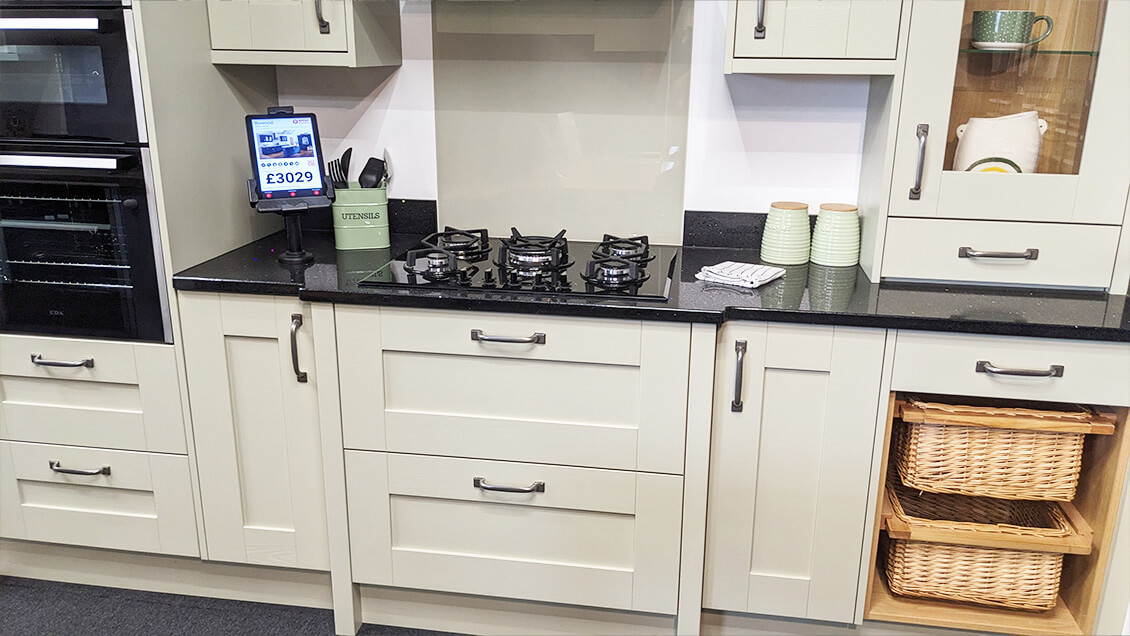
Traditional Pull Handles On Sage Green Shaker Kitchen doors Better Kitchens
Most handle screws employed for kitchen cabinet handles, pull handles and cabinet knobs are an M4 thread. This standard size facilitates the interchangeable use of various types of hardware on different cabinets, contributing to their versatility.
One pro tip when you're ready to drill holes for the new cabinet hardware is using a 5mm drill bit. This is slightly larger than the M4 thread and allows for a bit of wiggle room when installing the screws.
This will ensure that your screw holes are not too tight, thus avoiding undue stress on the threads and making installation easier.
Keep in mind that different door thicknesses require different handle screw lengths. Being aware of door panel thickness and selecting the appropriate screw length is key to a successful installation.
Too long a screw can protrude through the cabinet or drawer interior, while a short one may not secure the hardware properly.
By taking into account the size and thread of your handle screws, you're ensuring a solid and secure attachment of your kitchen cabinet hardware.
This, combined with the correct placement and spacing of your hardware holes, will result in a professional finish that can enhance the overall aesthetic of your new kitchen.
Making Use of Handle Jigs for Effortless Installation
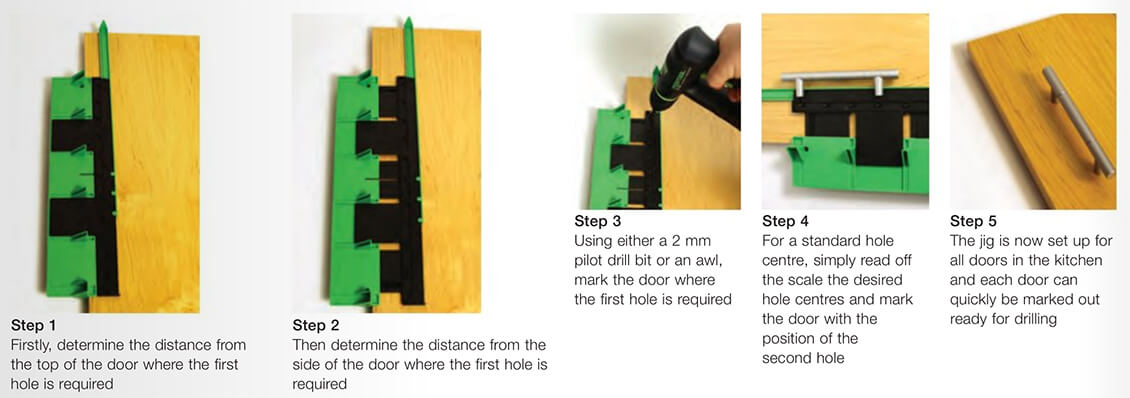
Handle Drilling Guide Jig from Better Kitchens
When installing new cabinet hardware such as cabinet pulls, finger pulls, or cabinet knobs, using a cabinet hardware jig can make the process significantly easier, particularly for first-time installers.
Handle jigs are valuable tools in ensuring accurate placement of your screw holes, significantly reducing the risk of ending up with a wrong hole in the wrong place.
A hardware template, also known as handle drilling jigs, aids in marking precise hole placements on the cabinet drawers and doors. It's crucial to especially note that for wider kitchen cabinets and drawers, use only one handle.
This is because, in frequent usage, people tend to pull from either one side or the other, leading to a twisting of the drawer mechanism over time. This can in turn lead to the mechanism's failure.
This is a particularly notable consideration if you're working on a kitchen renovation or are installing the new hardware on new cabinets for the first time.
While using the handle jig, remember that the handle centres often come at 32mm increments. This is the industry standard for cabinetry hardware, including kitchen cabinet handles, cup pulls, and pull handles.
Therefore, when you take your tape measure to mark the installation hole on your base cabinet doors, upper cabinets, lower cabinets, or wall cabinets, remember to mark at these increments.
Most importantly, place the handle itself, not the installation hole, as the point of visual reference. For example, if you're using a T-Bar handle which protrudes beyond the hole centre, using the hole centre as your primary positioning will lead to unattractively placed hardware.
So the easy way to perfect cabinet hardware placement? Familiarise yourself with using a cabinet hardware jig, take note of your measurement increments, and remember to position based on the aesthetics of the handle or knob, not the drill holes.
Keep these in mind, and your kitchen cabinet hardware installation is bound to be a success.
Understanding the Jargon: Handle Centres and Industry Standards
To continue from our previous point, understanding handle centres and industry standards can greatly aid in achieving neat and professional results in your kitchen renovation. Recognising these standards allows you to install your new cabinet hardware with a higher degree of precision and confidence.
Remember, the distance between handle centres (the two points where the screw holes are drilled) are typically set at 32mm increments. This is a universal industry standard, whether for kitchen cabinets or any other cabinetry hardware that requires handle installation.
The logic behind this fixed increment is likely due to manufacturing ease and uniformity among different types of kitchen cabinet handles, pulls or knobs on the market. So no matter the kind of hardware you choose, you will find this standard applicable.
But, why is this important? Adhering to this 32mm rule ensures that your drill holes align perfectly with your cabinet knobs or pull handles, reducing the chances of the 'wrong hole' scenario. Especially if you're installing hardware for the first time, this saves you from unnecessary stress and any potential damage to your new kitchen cabinets.
It's also worth mentioning that further adjustments may be needed based on factors such as the design of your door panel, location of the door hinges, or simply your personal preference. However, these 32mm increments serve as a solid starting point.
Before drilling your first hole, do a quick tape measure check to ensure correct hole placement. Make a pencil mark at each point where the centre holes for the handle or knob will be.
Employing a larger drill bit can also give a little wiggle room for minor adjustments, but consider this only if you are comfortable with the task as precision is key.
Using a cabinet hardware jig or a hardware template can further assist in your task by ensuring perfect alignment and spacing of the holes. This tool comes in particularly handy for wider drawer fronts and base cabinet doors as it prevents any risk of uneven or biased handle placement that could, over time, lead to mechanical issues.
We must emphasise that such attention to detail is not just for new cabinets but equally important for old cabinets. Slight differences in hole positioning can greatly impact the overall aesthetics of your kitchen, so take the time to get it right.
If you're replacing old hardware, remember to fill in any old holes and touch up the area to match your cabinet before starting on your hardware installation.
In conclusion, understanding these industry jargon and standards promises a smoother and more efficient kitchen hardware upgrade. However, if you ever feel overwhelmed, it's advisable to bring in a professional to avoid ending up with the wrong holes in the wrong place.
Pro Tips: Positioning Your Handles and Knobs for Best Visual Impact
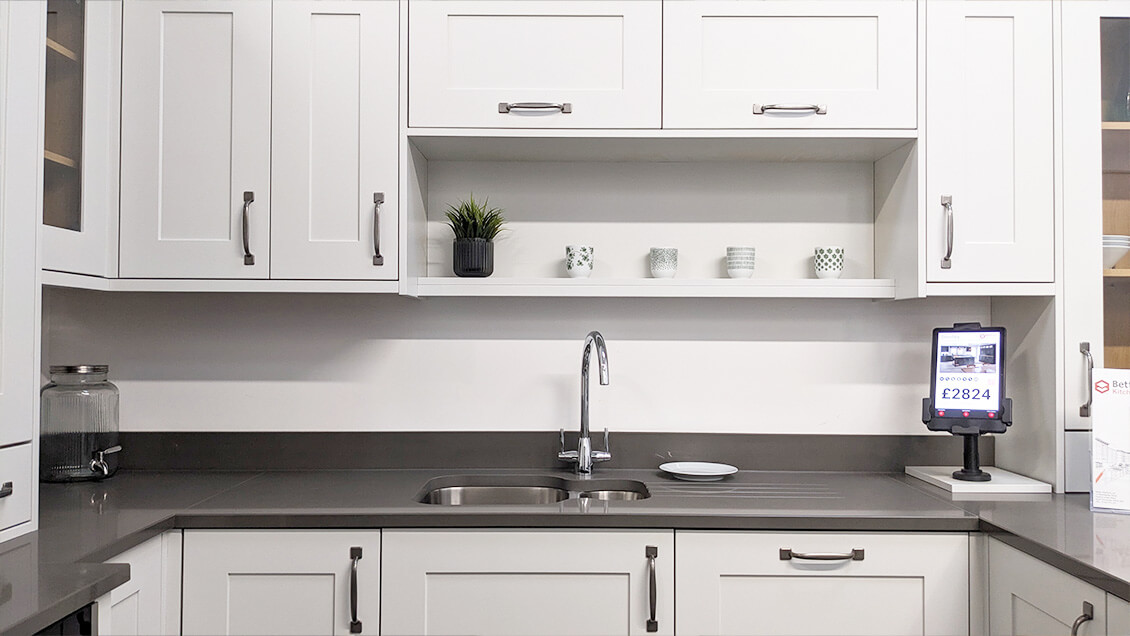
Pull Handles Correctly Placed on Kitchen Doors Better Kitchens
When it comes to the successful implementation of new kitchen cabinet hardware, positioning is key. You want to ensure that both your cabinet pulls and knobs are installed in places that not only provide functional benefits but also contribute to the overall aesthetic of your kitchen cabinets.
For instance, pull handles on the lower cabinets should ideally be installed in the top corner of the door, while those on wall cabinets should be affixed to the bottom corner.
This facilitates easy access and continues with traditional design language. Similarly, the base cabinet doors should ideally have the hardware placed on the lower corner, while upper cabinets should feature the hardware on the upper corner to maintain a uniform look.
Regarding knobs on cabinet drawers, consider their placement in the top of the drawer structure or the centre, depending on your personal preference and the standard pulls on your old cabinets.
Remember, though, when replacing old hardware, you need to bear in mind the position of the old holes. Mistakenly drilling in the wrong place could lead to aesthetic inconsistencies and probably more work.
As for drawer pulls, a common place for them is the centre of the drawer front. Slab drawers or wider drawer fronts usually harmonize with the hardware placed in the centre.
However, I warn against using 2 handles on wider drawer fronts. Habitually, users resort to using one side, causing twisting of the drawer mechanism resulting in failure over time.
The aforementioned are standard splits across most designs, yet the exact positioning can fluctuate based on the kind of hardware you are installing and the specific design of your kitchen cabinets. A trained professional or a knowledgeable DIY enthusiast often has their way of determining the best placements.
With regards to wooden knobs, a time-honoured cabinet makers technique subscribes to orienting the wood grain in such a way that it emulates a cheerful expression, akin to a smile.
Not only does this add a whimsical element to your décor, but it can also become a talking point, contributing to the happy ambience of your new kitchen.
This new hardware placement should be followed by proper installation. Spot drill holes after careful measurement, use a larger drill bit and always double-check before sinking the first hole.
Lastly, always remember that hardware installation is critical to your kitchen renovation. Proper kitchen cabinet hardware placement ensures not just aesthetic value, but also the longevity of your kitchen cabinets.
So, take your time to plan, measure, and proceed cautiously with putting your new cabinet hardware.
Old Cabinet Maker's Secret: How to Make Your Cabinets Look Happy
Now that we've covered the technical aspects of installing cabinet hardware, let's delve into a charming piece of industry insight. As a trained cabinet maker and professional kitchen installer, here's an old secret for adding a touch of character to your kitchen cabinets.
When installing wooden knobs onto your kitchen cabinets, it's essential to consider the direction of the wood grain. A subtle nuance that many may overlook is the positioning of the grain.
In an old cabinet maker's wisdom, the grain should emulate a smile rather than a frown. This little adjustment is an old technique used by cabinet makers to give the furniture a 'happy' appearance.
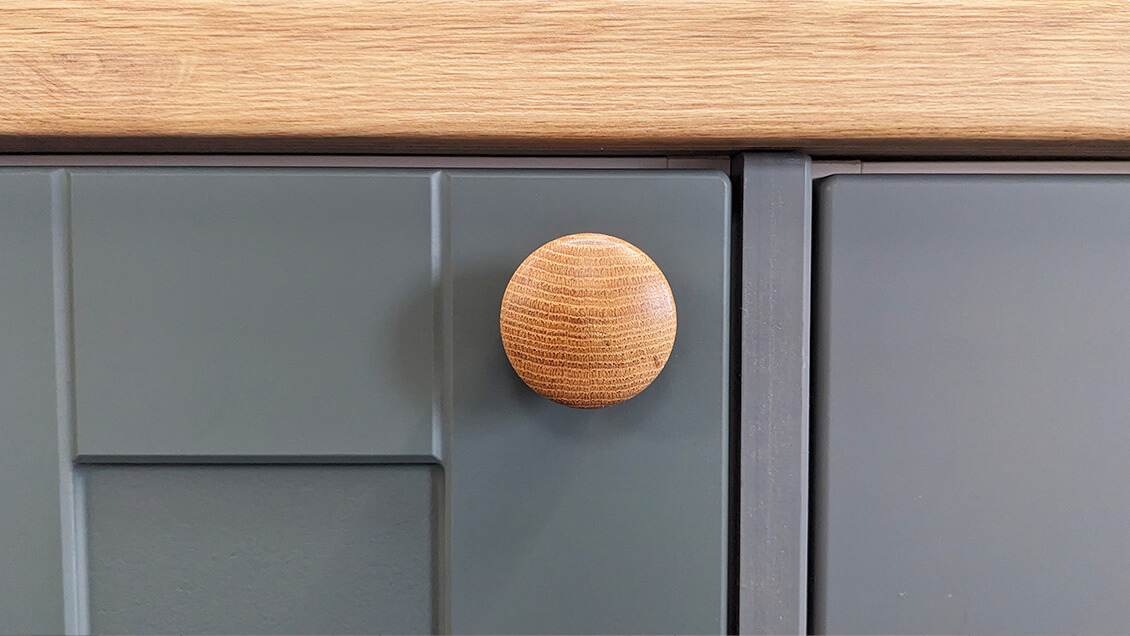
Happy smile on Wooden Oak Knob with upward woodgrain direction Better Kitchens
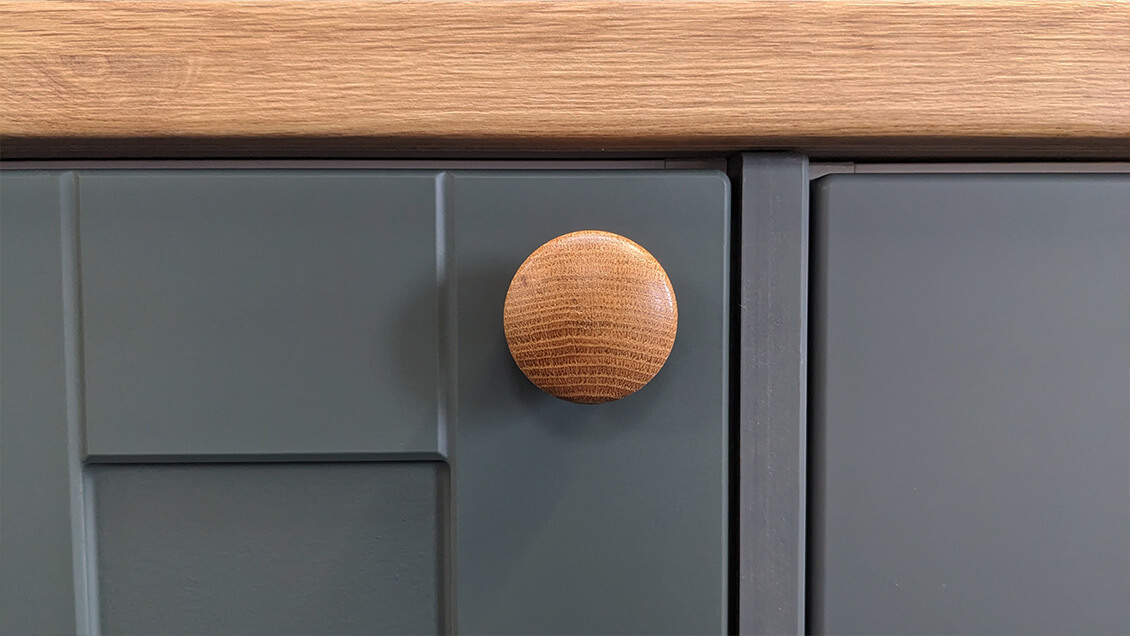 Sad frown on Wooden Oak Knob with down facing woodgrain direction Better Kitchens
This 'smiling' grain orientation can bring a touch of warmth and personality to your new kitchen cabinets, creating a pleasing atmosphere for everyone who steps into your kitchen.
It's an easy way to add a touch of life to your kitchen renovation project - a charming detail that only takes a few moments of your time in positioning the Oak knobs right.
This attention to detail, however minimal or inconsequential it may seem at first, can truly uplift the mood of your kitchen space. It's all about personal preference and how you envision your new kitchen looking and feeling.
Practicality does not have to be void of aesthetics - and nothing says that more than 'happy' cabinets greeting you each time you step into your new kitchen!
Common Mistakes to Avoid when Installing Cabinet Handles
Just as it's important to know what to do right in a kitchen renovation, it's equally necessary to be aware of some common errors. While mounting your new kitchen hardware might appear simple to even an amateur DIY enthusiast, certain missteps could potentially tarnish the aesthetic appeal of your newly refurbished cabinets.
Take heed of these mistakes when affixing cabinet knobs and pull handles:
Misaligned Screw Holes
One common mistake is drilling the screw holes in the wrong place. It is important to ensure accurate measuring using a tape measure or a cabinet hardware jig before creating the pilot hole.
Handles and knobs not being on the same level on adjacent doors can become a noticeable eyesore in your new kitchen.
Choose Wrong Size of Handles or Knobs
A larger drawer front could require larger or wider drawer pulls, meaning your chosen hardware can play a significant factor. Oversized pulls or knobs might overwhelm the design, while undersized ones can make using the cabinets a challenge.
Avoid Dual Handles on Wide Drawers
Similarly, it's recommended to evade using two handles on wider drawer fronts. We find that users often only use one handle which leads to twisting of the drawer mechanism over time.
An effective alternative could be a single, wider pull handle.
Wrong Handle and Knob Placement
Placement is a detail that mustn't be overlooked: Should the cabinetry hardware be placed on the top of the drawer or front of the cabinet door? Perhaps the edge of the door or the bottom corner of the door?
Ordinarily, base cabinet doors take hardware in the top corner of the door frame, whereas upper cabinets and wall cabinets may have the hardware installed in the bottom corner.
The aim is to install hardware in a place where it not only looks good but is also comfortable to use.
However, getting this wrong could result in achy fingers from repeatedly stretching to open your cabinets.
Meticulous planning and marking with pencil before drilling the first hole should help you avoid this.
Wrong Size Screw for the Job
Switching up old cabinet knobs or installing new hardware can bring new life to your kitchen cabinets, but it's not always as straightforward as it seems.
Cabinet Handle Screw - Better Kitchens
Different door thicknesses will require different lengths of handle screws. To avoid making the wrong hole, it's essential to use the right kind of hardware. Here's a simple yet helpful table to guide you:
| Door Thickness | Handle Screw Length |
|---|---|
| 12mm - 16mm | 22mm |
| 16mm - 20mm | 25mm |
| 20mm - 24mm | 28mm |
| 24mm - 28mm | 32mm |
| 28mm - 32mm | 38mm |
Remember, precise hole placement on your cabinets and drawers is crucial to ensuring hardware installation for the first time is done right. Incorrectly positioned hardware holes can lead to a kitchen renovation nightmare.
So, before you grab that drill and start making holes, measure twice and drill once. Doing so will save your lower and upper cabinets, as well as wall cabinets from having unnecessary drill holes or worst, holes in the wrong place.
"Handle jigs are very useful. We advise positioning of the handle itself rather than the hole for the screw. A T Bar handle protrudes past the hole centre and will not be visually pleasing if hole centre is used as the main position." - Ardene Stoneman
Sometimes, 'small' alterations like a new cabinet hardware or simply replacing old handles with new ones can make your kitchen feel brand new.
Just make sure you're drilling the first hole correctly, and the rest of the cabinet hardware installation should be an easy and rewarding task to handle on your own.
Taking Measures: How to Measure for New Cabinet Hardware
Firstly, you'll need to locate the spot where you intend to install your new cabinet hardware. Grab your tape measure and start by measuring the cabinet doors.
For base cabinet doors, the traditional placement for knobs and pulls is in the corner of the cabinet door. The exact location can differ based on personal preference, but it's generally about 2.5 cm to 5 cm from the top corner of the door.
For the upper cabinets, the knobs or pulls often line up with bottom corner of the door or the top edge of the lowest door panel. With drawer fronts, the hardware is typically placed in the centre of the drawer, or the top of the drawer if there are two or more drawers stacked vertically.
Of course, for an easy way to decide on the right placement, you can always use old holes, if they're available and line up with your new hardware.
However, if you’re dealing with new cabinets, or if you're determined to move your knobs and handles to a new position on your old cabinets, you'll need to create new holes.
On a slab drawer front, opt for a larger drill bit to account for the M4 thread size of the handle screws. To take the guesswork out of it, we advise using a 5mm drill bit for some extra wiggle room.
Draw a line with a pencil mark where you want your hole to go. As tempting as it may seem to eyeball it, especially if you've done this before, a more measured and careful approach is always advisable for perfect placement of your kitchen cabinet hardware.
Make sure you don’t place the hardware holes too close to the edge of the door or drawer front. This could lead to splintering of the wood, resulting in unnecessary additional work.
Also, consider the size of your hardware, especially for larger pull handles or finger pulls. You wouldn't want them sticking out awkwardly from the side of your cabinets.
Keeping these measurements in mind and double checking before you drill holes is crucial for a successful kitchen renovation and hardware installation. Next up, we'll dive into how to drill your first hole, ensuring your handles or knobs are attached securely and accurately.
Your Guide to Installing Drawer Fronts and Drawer Pulls
The first step in installing your new kitchen cabinet hardware is to select the kind of hardware you wish to use. Choices range from traditional cabinet knobs and coinciding cabinet pulls, to more modern pull handles, or finger pulls.
The style chosen often hinges on personal preference, the style of the kitchen cabinets, and the overall kitchen design.
Step 1:
Once you have your new cabinet hardware, start by removing any old hardware from your kitchen cabinets and drawer fronts. This would typically involve unscrewing the old handles or knobs from the front of the cabinet door or drawer front.
Step 2:
The next step is to locate where you want your new hardware to be. This is where a pencil mark comes in handy. Note the desired hole placement on the door panel with a pencil. The specific placement of hardware can vary depending on door style and personal preference.
For standard pulls on cabinet drawers, typically the centre holes are located in the centre of the top of the drawer. For base cabinet doors, the hardware is often placed in the top corner of the door, whereas with wall cabinets it could be in the bottom corner of the door.
The hole for a knob is typically centred from the edge of the door. If installing cup pulls on drawer fronts, the bottom of the door is a good place for them. Remember that the centre of a handle is often located across the rail or the door frame.
Step 3:
One way to ensure consistent hardware placement across all kitchen cabinets and drawers is to use a hardware template or cabinet hardware jig. This tool makes it easy to mark out placement for multiple handles and knobs with consistency and accuracy.
Step 4:
After marking the specific location for your new kitchen cabinet handles or cabinet knobs, it's time to drill the pilot hole. Always start with a smaller drill bit, and increase size gradually if needed. This helps prevent mistakes and splitting of the wood. The screw holes should be exact, not based on estimations. Remember, handle screws are generally an M4 thread and a 5mm drill bit allows for wiggle room.
Step 5:
Lastly, align the new kitchen hardware with the screw holes. Insert and tighten the screws from the back of the drawer or door panel. Ensure you choose the correct screw length based on the door thickness to avoid any hardware installation mishaps. Lower cabinets' thickness may vary compared to upper cabinets, hence possibly needing different screw lengths.
Installing new cabinet pulls and drawer knobs is an effective and straightforward way to freshen up old cabinets or add a finishing touch to new cabinets.
Be sure to measure twice and cut once to prevent any unnecessary holes. Take your time during this kitchen renovation process, and you'll be pleased with the kitchen cabinet hardware update.
Ready to transform your old kitchen into a space that's functional and stylish? Our expert team at Better Kitchens can help guide you through every step of your kitchen renovation.
From choosing the perfect hardware to installation, we've got you covered. Turn your new kitchen dream into a reality today , see our Affordable Kitchens online.

